How to Install an Electric Patio Heater: Wall, Ceiling, Tripod & Hardwired Models
Short answer: install an electric patio heater by starting with the exact model number, current manual, approved mounting method and required power connection. A 120V freestanding heater, a wall-mounted 1500W unit, a 240V plug-in model and a 240V hardwired heater do not share one installation process.
Electrical safety: this guide explains planning, mechanical mounting and final checks. It is not a wiring diagram. New receptacles, 240V circuits and hardwired connections should be evaluated and completed by a qualified licensed electrician in accordance with the heater manual, rating label and local requirements.
The most common installation mistake is treating a patio heater as a generic appliance. ThermoMate's current infrared heater range includes freestanding, tripod, wall-mounted, wall-or-floor, wall-or-ceiling, 120V plug-in, 240V plug-in and 240V hardwired models. The hardware, orientation, clearances and power supply change with the model.
This updated guide explains how to install an electric patio heater with a model-first workflow instead of universal advice. Use it to plan the job, then keep the exact manual open while you work. If the article and manual ever disagree, the current manual controls.
1. Identify the model before you choose a location
Find the model number on the heater's rating label, carton or order record. Do not identify a unit by color or shape alone. Several ThermoMate heaters use a long black housing but have different voltage, mounting and clearance requirements.
- Record the full model number. For example, EIH3000B and EIHS3000B are both 3000W heaters, but one is hardwired while the other uses a 240V NEMA 6-15P plug.
- Download the current manual. Start at the ThermoMate manual library or use the instruction-manual link on the product page.
- Match the rating label. Confirm voltage, frequency, wattage and connection type.
- Confirm the permitted mounting style. A freestanding model should not be improvised into a wall heater, and a wall-only model should not be ceiling-mounted unless its instructions explicitly permit it.
- Check intended use. Product names, category labels and lifestyle images do not override "Outdoor Use Only" or other restrictions in the manual.
If you are still choosing a model, compare wattage, voltage and mounting styles in the infrared patio heater buying guide. If the planned location is enclosed, also review the model-first indoor-use guide before installation.
2. Use the connection type as the first go/no-go decision
Power availability is not a detail to solve after the heater is mounted. Confirm the connection before drilling, assembling a tripod or choosing a wall position.
| Connection | Typical ThermoMate examples | Installation decision |
|---|---|---|
| 120V plug-in | EIHF1500V, EIHF1500B, EIHFW1500B, EIHSW1500B, EIH1500B, EIH1500GLB | The cord must reach an appropriate wall receptacle without an extension cord or power strip. Do not mount first and discover that the cord is too short. |
| 240V plug-in | EIHS3000B with NEMA 6-15P plug | A compatible 240V receptacle and circuit are required. A NEMA 6-15P plug is not compatible with a standard 120V household receptacle. |
| 240V hardwired | EIH3000B and EIH4500B | Use a qualified licensed electrician. The circuit, conductors, grounding, disconnecting means and connection enclosure must match the manual, rating label and local requirements. |
Never cut off a plug, improvise an adapter or convert a hardwired heater into a cord-and-plug appliance. If the required supply is not already available, move the installation or have the electrical work designed before mounting the heater.
3. Plan the heat path, mounting surface and clearances
Infrared heat is directional. The goal is to aim the heater at the occupied zone while keeping people, furniture and combustible materials outside every restricted area shown in the manual.
Map the occupied zone
Mark where people actually sit or stand. Aiming at the center of an empty patio does not help if the dining table sits along one edge. Keep the unit out of traffic paths, door swings and areas where a person can touch the hot grille or housing.
Inspect the mounting surface
A bracket must attach to a sound structural surface that can support the appliance and installation loads. The manual may show concrete, wood or metal as acceptable examples, but the correct fastener depends on the real substrate. Decorative cladding, thin trim and unknown hollow material are not automatically structural.
Before drilling, check for concealed electrical cables, plumbing and other services. If the wall construction or load path is uncertain, use a qualified installer rather than guessing at anchors.
Measure the exact model clearances
Do not reuse one clearance number across the range. For example, the current EIH1500B/EIH1500GLB manual shows a minimum mounting height of 6 feet and at least 1.7 feet from the ceiling, roof or both side walls. The current EIH4500B manual instead calls for the bottom of the heater to be at least 95 inches above the floor, at least 19.7 inches from adjacent walls or ceiling, and at least 3 feet from combustible materials in front.
Those numbers are examples of why the manual must stay with the job. Measure from the points shown in its diagram, not from whichever edge is convenient. Recheck after the heater is angled because the radiant path changes when the unit is aimed.
4. Gather the tools and parts for the exact mounting method
A typical wall-mount installation may require a pencil, tape measure, level, drill and suitable bits, screwdriver, approved fasteners, the supplied bracket and the model's included bolts, washers and nuts. A stable ladder may also be needed for a high mounting position.
That list is only a planning guide. Open the carton and compare every part with the manual before starting. Do not substitute a fastener simply because it fits through the bracket. Confirm that:
- the heater and grille are undamaged;
- the model number matches the manual;
- the correct wall, ceiling, floor or tripod parts are present;
- the mounting surface is compatible with the chosen fasteners;
- the cord and plug are undamaged on plug-in models;
- the supplied bracket can hold the heater at a permitted angle; and
- the power source will be reachable without routing the cord through the heated area.
Stop if hardware is missing, the housing is bent, the grille is loose, the cord is damaged or the instructions do not match the product.
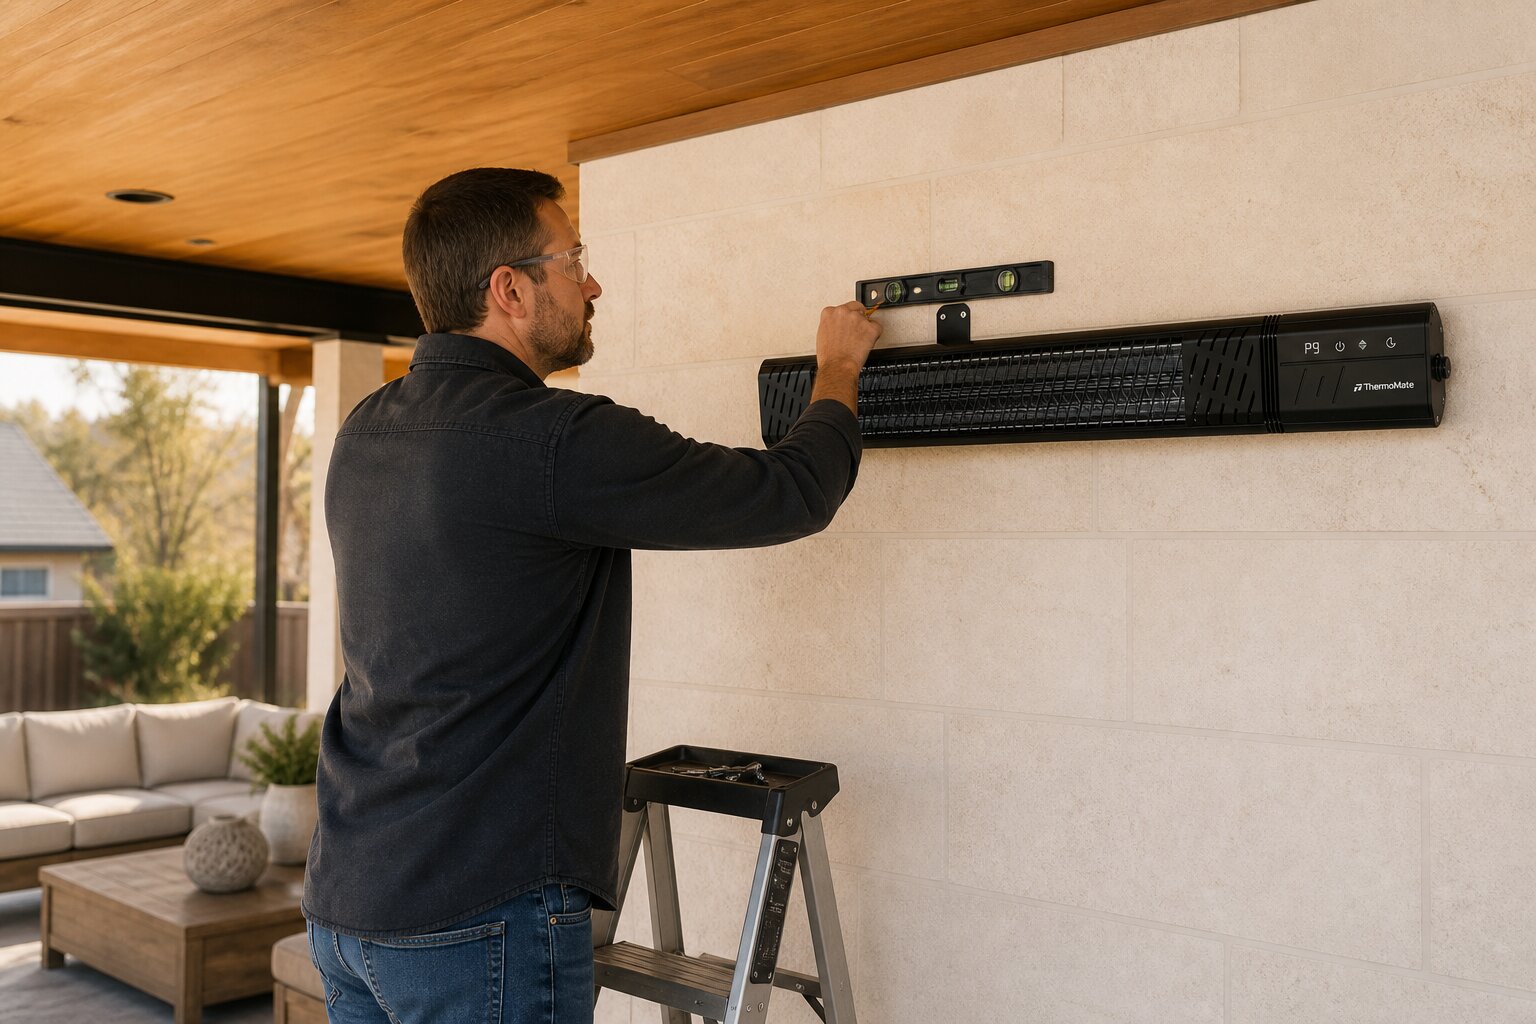
5. How to install a wall-mounted electric patio heater
The sequence below describes the shared mechanical workflow. Use the measurements, hole pattern, bracket orientation and fasteners in your model's manual.
- De-energize the work area. Keep the heater unplugged. For a fixed electrical installation, the electrician should establish a safe de-energized condition before work begins.
- Mark the finished heater position. Use the manual's minimum height, ceiling clearance, side clearances and aiming limits. Check the full heater footprint, not only the bracket.
- Hold the bracket level. Mark the specified holes while confirming that the bracket orientation will place the heater and control display in the direction shown in the manual.
- Check behind the marks. Verify that the drilling area is free of hidden wiring, pipes and other services.
- Drill for the actual substrate. Use the bit and structural fastener appropriate for the wall construction and loads. Do not use cosmetic cladding as the only support.
- Secure and inspect the bracket. Tighten the fasteners evenly. The bracket should not rock, twist or pull away from the surface.
- Attach the heater with the supplied hardware. Support the unit until every required bolt, washer and nut is installed. Use a second person when the heater's size or mounting height makes one-person handling unsafe.
- Set only an approved angle. Aim the heat at the occupied zone without pointing it at the ceiling, wall, furniture or combustible storage.
- Route the cord or supply away from heat. It must not pass across the front grille, reflector, heated air path, sharp edge or walking path.
- Repeat all measurements. Verify floor height, ceiling and side distances, front clearance and cord reach after the heater is fully assembled.
Some dual-purpose models require an extra cover or part for wall installation. For example, the EIHFW1500B manual shows a covering bracket used when the product is wall-mounted. Do not omit a part because the heater appears to hang securely without it.
6. How ceiling mounting differs
Ceiling mounting is permitted only for models whose current manual explicitly shows that orientation. Among the current ThermoMate range, the EIH3000B and EIH4500B product information and manuals describe wall or ceiling mounting. Wall-only 1500W models should not be moved to the ceiling based on a generic bracket.
A ceiling installation adds several checks:
- The ceiling structure must support the heater and bracket at every permitted angle.
- The lowest part of the heater must remain at or above the model's minimum height.
- Corner, ceiling, wall, person and combustible-material distances must all be checked separately.
- The supply cable must stay away from the hot body and radiant path.
- The heater must not hang where a door, awning, fan, storage item or service equipment can contact it.
- For a hardwired ceiling installation, the electrical connection remains electrician work.
The EIH4500B manual, for example, specifies a 45 to 90 degree range for ceiling mounting and requires a minimum 95-inch floor height. Do not transfer that angle or height to another model without verifying its manual.
7. How to assemble a tripod patio heater
The EIHSW1500B is designed for either its supplied tripod or a wall mount. The tripod is not a shortcut around clearance requirements; it changes how the heater is supported and how the area must be managed.
- Open the three feet fully on a level, stable surface.
- Lock every height adjustment and support joint as shown in the manual.
- Attach the heater using the supplied fire bracket and L-shaped bracket.
- Tighten the specified bolts and butterfly nuts so the heater cannot rotate unexpectedly.
- Set the permitted height and aiming angle, then check the heat path.
- Place the tripod outside walkways, play areas and locations where a chair or table can strike a leg.
- Route the 120V cord so it cannot be pinched, heated or create a trip hazard.
Do not place a tripod on a sloped deck, unstable pavers or soft ground. Do not hang objects from it or use improvised weights that interfere with the feet. If the patio is too exposed or crowded for a stable stand, use a correctly installed wall model instead.
8. How to set up freestanding and wall-or-floor models
Freestanding models avoid drilling, but they still require assembly, placement and power checks.
EIHF1500V and EIHF1500B freestanding towers
Assemble the base, guard and other supplied parts exactly as shown in the manual. Keep the heater upright on a firm, level surface. The current EIHF1500V manual states "Outdoor Use Only" and instructs users to keep combustible materials at least 3 feet away. The EIHF1500B manual directs the heater to an appropriate wall receptacle and warns against extension cords and relocatable power taps.
EIHFW1500B wall-or-floor model
This model can stand vertically on its base or be installed horizontally on a wall. Build only the configuration you intend to use, and install the wall-mount covering bracket when the manual requires it. A vertical floor setup should be stable, unobstructed and out of traffic; a wall setup must meet the manual's 6-foot minimum height and 1.64-foot ceiling and side clearances.
For every portable configuration, confirm that tip-over protection is not being treated as permission to put the heater in an unstable location. A safety switch is a backup, not a substitute for a level surface and protected placement.
9. Complete the electrical connection safely
120V plug-in heaters
Inspect the plug, cord and receptacle before use. The receptacle must match the heater rating and be in good condition. Keep outdoor connections protected as required by the manual and local installation. Plug the heater directly into the appropriate wall receptacle when the manual requires it.
Do not use a power strip, relocatable tap or convenience extension cord. U.S. Consumer Product Safety Commission guidance for portable electric heaters likewise advises direct wall-outlet connection because high-resistance connections can overheat. If the cord does not reach, the installation location or electrical supply needs to change.
240V NEMA 6-15P plug-in heater
The EIHS3000B product page identifies a 240V, 15A NEMA 6-15P plug. Verify that the receptacle configuration, voltage and circuit are correct. Do not use an adapter to fit a 120V outlet, and do not assume that every existing 240V receptacle is suitable for the heater. Have an electrician evaluate any uncertainty.
240V hardwired heaters
The EIH3000B and EIH4500B require hardwiring. The homeowner's installation task ends at planning the mounting position and providing the model documentation. A licensed electrician should verify the branch circuit and make the permanent connection. Do not publish or follow color-to-color wiring shortcuts without the exact manual, current product revision and local installation context.
10. Model-by-model installation reference
The table summarizes the current U.S. product pages and official manuals checked on August 21, 2026. It is a routing tool, not a substitute for the complete manual.
| Model | Power | Approved configuration shown | Critical installation note |
|---|---|---|---|
| EIHF1500V | 120V plug-in | Freestanding | Manual states Outdoor Use Only; upright placement; keep combustibles at least 3 feet away. |
| EIHF1500B | 120V plug-in | Freestanding | Assemble base and guard; use an appropriate direct wall receptacle; no extension cord or power strip. |
| EIHFW1500B | 120V plug-in | Freestanding or wall-mounted | Wall setup: at least 6 feet above floor and 1.64 feet from ceiling and side walls; use the required covering bracket. |
| EIHSW1500B | 120V plug-in | Tripod or wall-mounted | Wall setup: at least 6 feet above floor and 1.64 feet from ceiling; tripod must be fully opened, locked and stable. |
| EIH1500B | 120V plug-in | Wall-mounted | Shared manual: minimum 6-foot height and 1.7 feet from ceiling, roof and both side walls. |
| EIH1500GLB | 120V plug-in, 12.5A listed | Wall-mounted | Shared manual: minimum 6-foot height and 1.7 feet from ceiling, roof and both side walls. |
| EIH3000B | 220-240V hardwired | Wall or ceiling | Qualified electrician; manual shows at least 94.5 inches above floor, 13 inches from side walls and 3 feet from combustibles. |
| EIHS3000B | 240V NEMA 6-15P plug-in | Wall-mounted | Use a compatible 240V receptacle; manual shows at least 6 feet above floor and 1.64 feet from ceiling and both side walls. |
| EIH4500B | 240V hardwired | Wall or ceiling | Outdoor use only; qualified electrician; at least 95 inches above floor, 19.7 inches from adjacent walls/ceiling and 3 feet from combustibles. |
11. Commission the heater before regular use
Do not treat the first power-on as a quick proof that the job is finished. Complete a controlled inspection.
- Confirm every bracket fastener and heater attachment is present and tight.
- Check the final height, angle and all clearances.
- Remove packaging, tools and combustible debris from the heat path.
- Confirm the cord is not pinched, stretched or touching the heater.
- For plug-in models, insert the plug fully into the correct wall receptacle.
- For hardwired models, have the electrician complete the required tests and energization.
- Start at the manual's recommended setting and observe the unit.
- Test the control panel, remote, timer and available safety functions according to the manual.
- Listen for unusual vibration and watch for movement at the bracket or stand.
- Turn the heater off and recheck the installation after it has fully cooled.
Stop immediately if a plug or receptacle becomes excessively hot, the circuit trips, the heater shifts, the control behaves unexpectedly, the cord contacts a hot area or an unusual smell persists. Disconnect power safely and contact a qualified service professional or ThermoMate support.
12. Common installation mistakes to avoid
- Using one generic clearance. Different manuals show different heights and wall, ceiling, person and combustible distances.
- Mounting before checking voltage. The finished location may not have the correct 120V or 240V supply.
- Confusing 240V plug-in with hardwired. EIHS3000B and EIH3000B require different electrical plans.
- Using the wrong orientation. A wall-only model is not automatically ceiling-approved.
- Routing the cord through the hot zone. Keep it away from the grille, reflector, housing and radiant path.
- Using an extension cord or power strip. Move the heater or install the appropriate permanent supply instead.
- Relying on decorative cladding. The bracket needs a sound structural attachment.
- Skipping the after-aiming measurement. Tilting the heater can bring walls, furniture or people into the heat path.
- Treating an IP rating as unlimited weather permission. Follow the manual for orientation, connection protection, storage and exposure.
- Assuming a garage photo proves indoor approval. Verify the intended-use statement in the exact manual.
Frequently asked questions
Can I install a 1500W patio heater myself?
Some freestanding and tripod assembly can be straightforward when the manual permits it and all parts are supplied. Wall mounting still requires a sound structural attachment and concealed-service check. Any new receptacle, uncertain circuit, 240V work or hardwired connection should be handled by a qualified licensed electrician.
How high should an electric patio heater be mounted?
Use the exact manual. Current ThermoMate examples range from a 6-foot minimum on several 1500W and 240V plug-in wall models to about 95 inches on the EIH3000B and EIH4500B. Height alone is not enough; ceiling, side, front, person and combustible clearances also apply.
Can every wall-mounted patio heater be installed on the ceiling?
No. Ceiling mounting must be shown in the current manual for that model. The current EIH3000B and EIH4500B instructions cover wall or ceiling mounting. Wall-only models should remain in their approved orientation.
Can I plug a 1500W heater into a normal outlet?
Many ThermoMate 1500W models are listed for 120V plug-in use, but the receptacle and circuit still need to be appropriate and in good condition. Follow the rating label and manual, plug directly into the required wall receptacle, and do not use a power strip or convenience extension cord.
Does a 240V patio heater need an electrician?
A hardwired 240V model does. A 240V plug-in model still needs a compatible receptacle and circuit; if those are not already present or their suitability is uncertain, have a licensed electrician evaluate the installation.
Can I mount an outdoor heater under a covered patio?
Only when the exact model's intended use, orientation, mounting clearances and weather-exposure instructions permit that location. "Covered" does not automatically satisfy distance requirements, and an IP rating does not replace the manual.
What if the product page and manual disagree?
Stop and use the more restrictive instruction while asking ThermoMate for written clarification. Do not choose the wording that makes the installation easier. Keep the model and serial information available when contacting support.
Install by model, not by guesswork
A safe electric patio heater installation starts before the first hole is drilled. Identify the model, confirm the connection, choose an approved mounting method, measure every clearance, use a sound structural attachment and keep electrical work within the right professional scope.
Download the exact ThermoMate manual, then compare current models in the infrared heater collection. If documentation is missing or conflicting, pause and contact support rather than improvising.
Sources and review notes
- ThermoMate U.S. manual library
- ThermoMate EIHF1500V official manual
- ThermoMate EIHF1500B official manual
- ThermoMate EIH1500B/EIH1500GLB official manual
- ThermoMate EIHFW1500B official manual
- ThermoMate EIHSW1500B official manual
- ThermoMate EIH3000B official manual
- ThermoMate EIHS3000B official manual
- ThermoMate EIH4500B official manual
- U.S. CPSC portable electric heater safety guidance